How To Make a Wall Clock
I really gravitate towards the practical DIY and home decor projects, and after shopping for months for a new clock for our home, I decided that I would try and make one. A clock, so it seems, could be made using any number of materials, of any size, to fit exactly the space and design you’re looking for in your home, and I loved the appeal in being able to have something completely unique and custom.
What I was more curious about, though, was actually how an everyday DIYer could find the components and learn how to assemble a functioning clock. Was it hard? Were the parts hard to come by? Are the mechanisms what make the store-bought clocks so pricy? And could I assemble a clock myself without completely messing up the orientation of the hands?
Turns out, it’s easy! The parts that you need to buy are inexpensive, and there are plenty of options so that you can customize your project to your home’s needs and your own design aesthetics.
My planning and researching led me down a number of channels, and I scoured local retailers and picked their associates’ brains, and spent even more time scoping out inventory sold through online specialty shops. I landed on purchasing through Klockit.com because if there is one thing they seem to know, it’s clock parts. Hands are included in a set, and you’ll have a nice selection to choose from when designing your custom clock. You’ll even have your choice of battery-powered Quartex-branded movements vs. electric. I went with the corded electric product because I think battery-run clocks are the pits. Reliability is important in a clock.
There are an infinite number of ways to approach assembling your own clock — I used a piece of plywood for demonstration below, but you can easily fit the movement components into any number of materials, like into the center of a vintage dinner plate with the help of a diamond drill bit, or onto a piece of tile or onto a chalkboard (think of the creative possibilities with chalk-drawn numbers!).
Ready to see how easy it is to make your own clock?
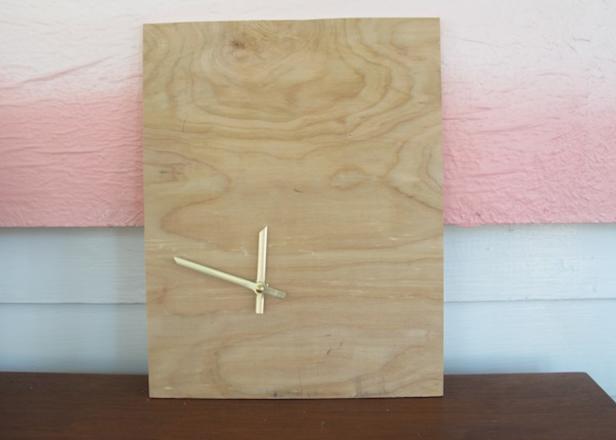
Step 1: Start with the base of your clock. What are you making it out of? I chose a piece of rectangular plywood, the kind that could be stained nicely but that has grain and a nice appeal. I love natural wood decor in my home, but if that’s not your style, consider tile (like vintage hexagonal tiles from the salvage shop), dinner plates (a fun addition to any kitchen), or obscure parts (I’ve seen them handmade out of bicycle wheels, on un-hung street signs, and built within books, so that the hands pop through the cover).
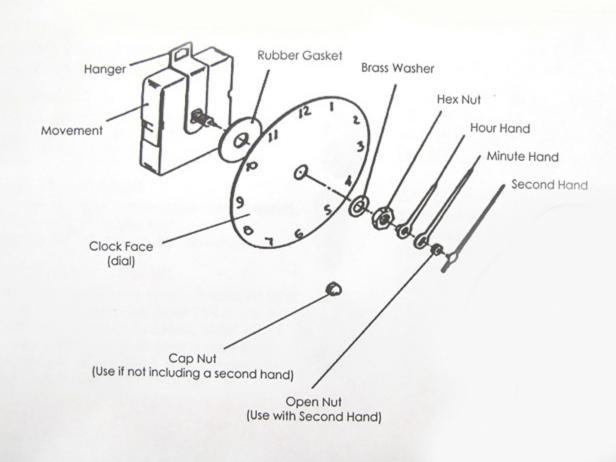
Use a drill bit to create a space for the “I” shaft. I used a 5/16″ bit.

Step 2: Note the thickness of what you are building onto — if your material is thin like mine, you’ll have to fabricate a spacer to fit between the mechanism and the front of the clock so only a few of the threads on the “I” shaft show through the hole.

Step 3: Assemble the clock hands per the instructions. It will take all of 60 seconds and it is very easy, but the hands are fragile, so be gentle.
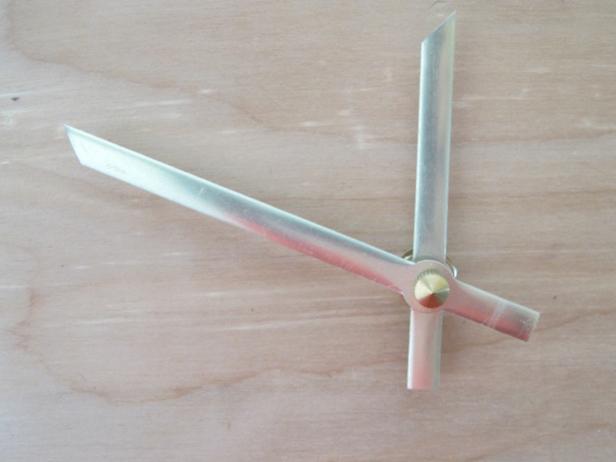
Step 4: Once assembled, it will look complete, and very similar to this (depending on whether or not you add a hand for the seconds, which is just a third hand added at the tip).

Step 5: (Optional) The metal hands can be cut to length with metal snips if you desire a different look or if you need shorter hands to fit your project.

Step 6: Trimmed to length, I also changed the way the tip of each hand looks.
0 Response to "How To Make a Wall Clock"
Post a Comment